
Straightforward Simple Henna Plans
Here’s a Simple Henna Plans and rich mehndi (henna) plan that culminates for fledglings or a speedy application.

Fundamental Botanical Simple Henna Plans
Begin with a dab – Make a little dab on your palm or the back of your hand.
Draw a bloom Simple Henna Plans

Around the dab, make 5-6 little petals in a circular shape.
Include takes-off – Draw straightforward bent lines (like commas) on either side of the blossom.
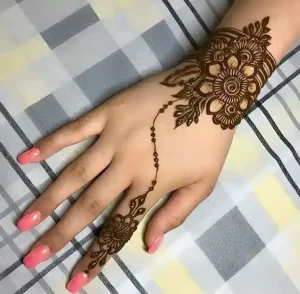
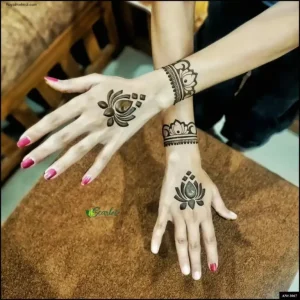
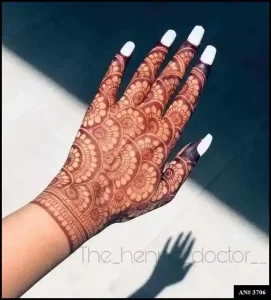
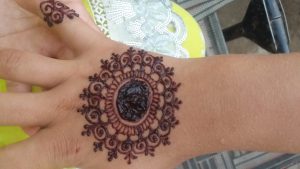
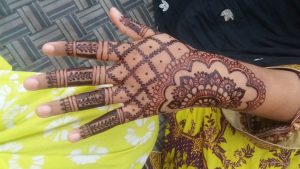
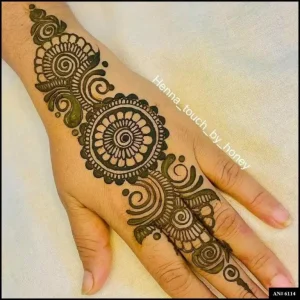
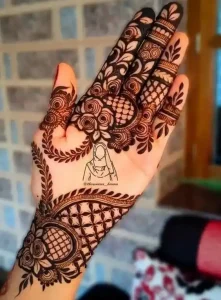
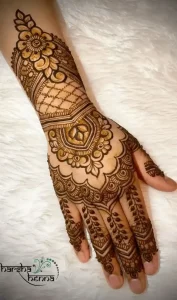
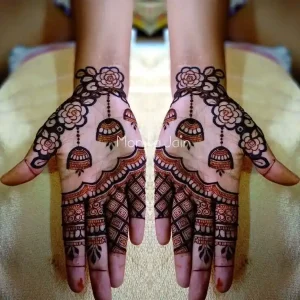
Tikki Style Henna Plans for Bridal

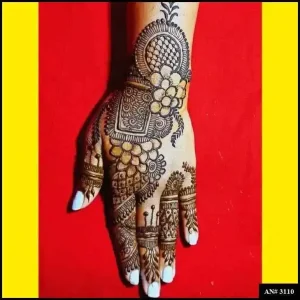
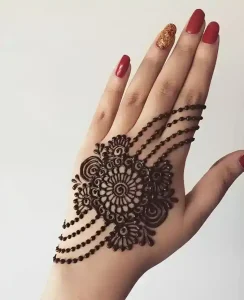
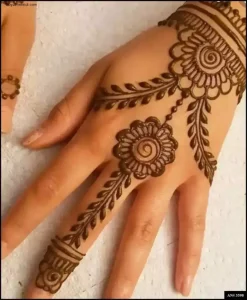
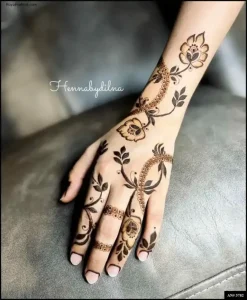
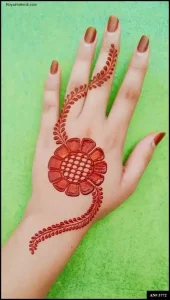
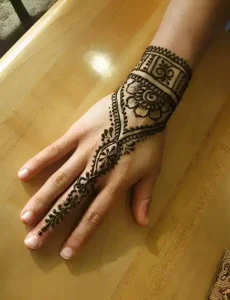
Bracelet with Flower Style Henna Plans
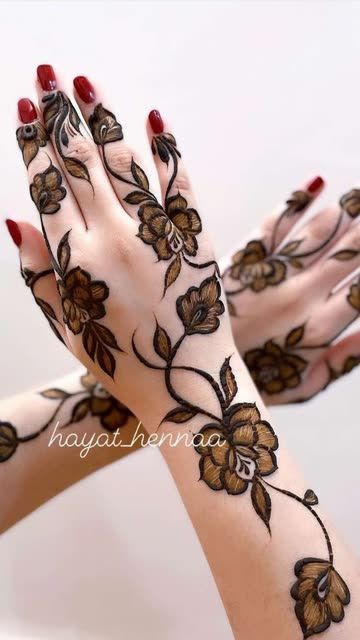
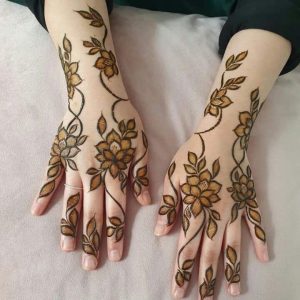
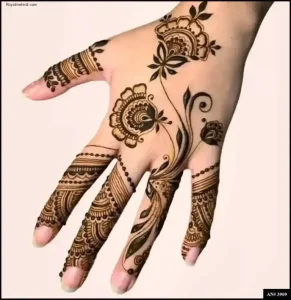
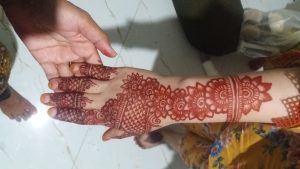
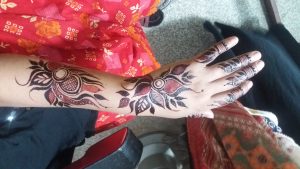
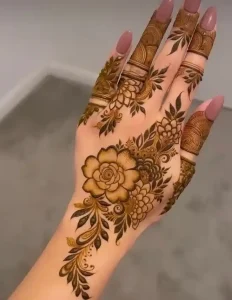
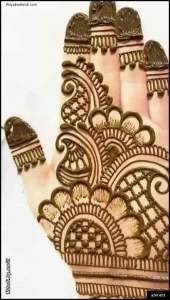
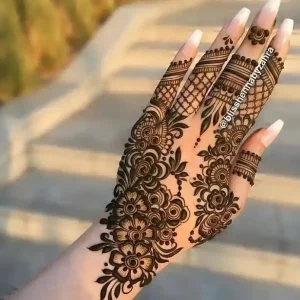
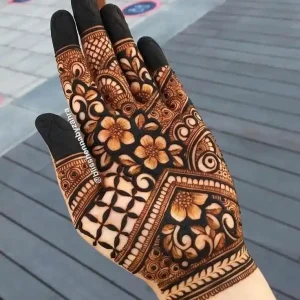
Full Filling Leaf and Flower Design

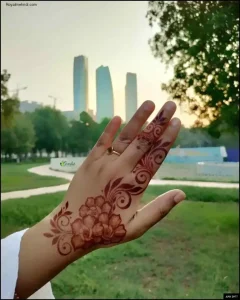
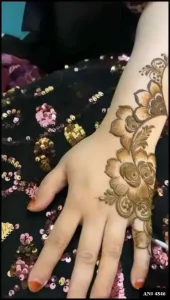
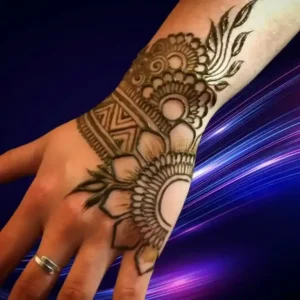
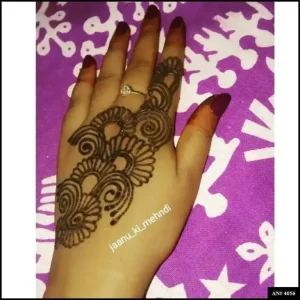
Arabic Bail Henna Plan

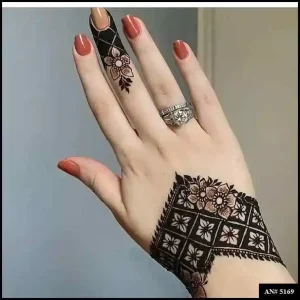
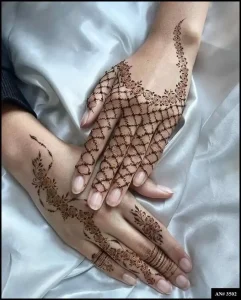
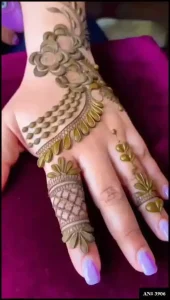
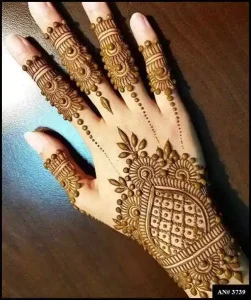
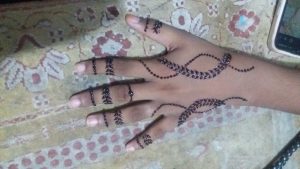
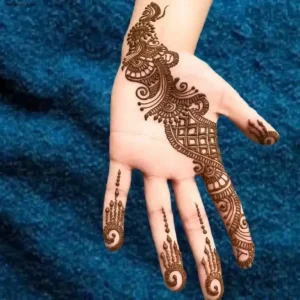
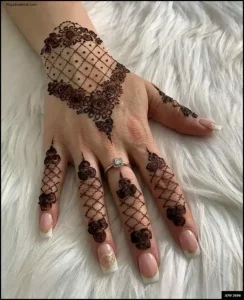
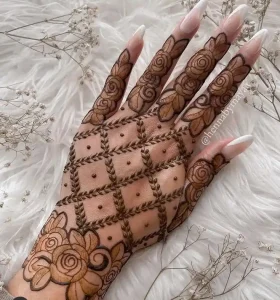
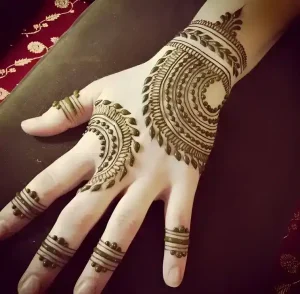
Unique Jaal Bracelet Henna Plan
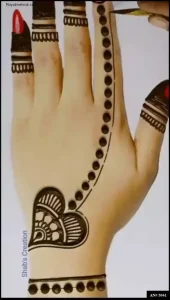
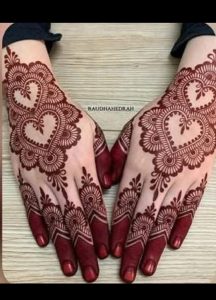
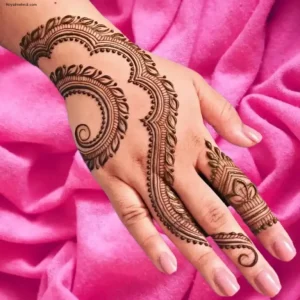
Simple Heart Bail Design
Expand with a vine – From the blossom, draw a lean, wavy line amplifying toward your fingers.
Include little specks & clears out – Along the vine, put minor specks or little leaf shapes for detail.
Tips for a Clean See:

Utilize a cone with a fine tip for accuracy.
Keep the plan minimal focus on symmetry

Simple Flower Henna Design:
Tikki Style Henna Plans:
If you make a botch, tenderly rub off the damp Simple Henna Plans and modify it.
Would you like a finger plan or a wrist design to go with it?
Begin with a speck
Here’s a super straightforward Simple Henna Plans starting with just a dot—perfect for beginners!
Step-by-Step:
Make a dab
Begin with a little henna dab within the center of your palm or fingertip.
Encompass with petals
Draw 4-5 bent lines (like enclosures) around the speck to make a minor bloom.
Types of Henna Design
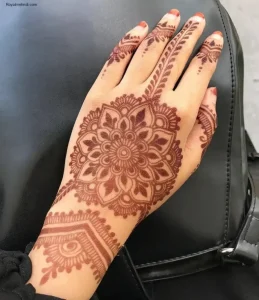
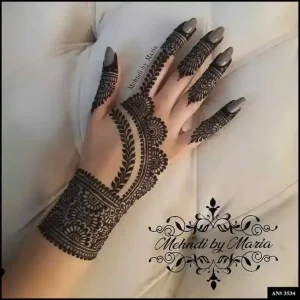
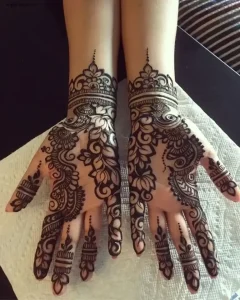
Royal Henna Plans for Bride

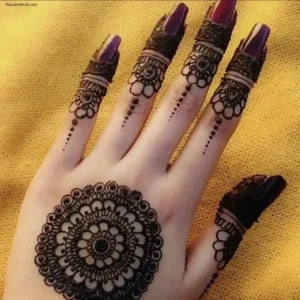
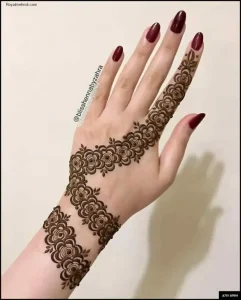
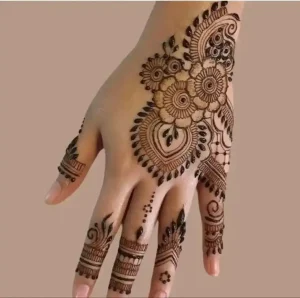
Flower Jewelry Henna Plan
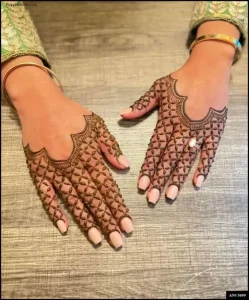
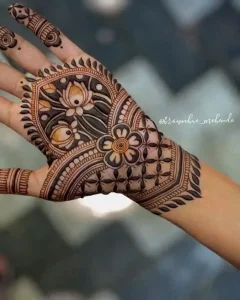
Flower Jaal Design for Bride
Jaal Circle and Square Design:
Include a stem – Amplify a lean, somewhat wavy line from the bloom toward your wrist or finger.
Smaller than expected clears out
Along the stem, draw little “comma” shapes or minor tears for clears out.
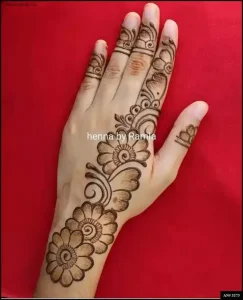
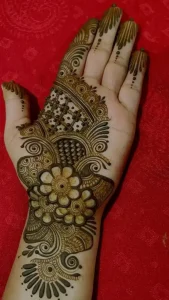
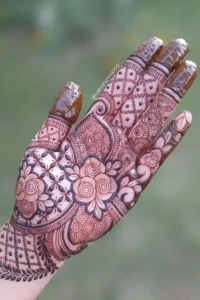
Bridal Henna Design Full Filling plan

Cute Bail Henna Design

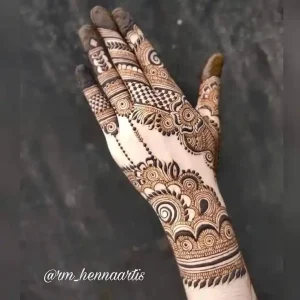
Stylish Bail Henna Design:
Stylish Tikki Mehndi Design
Small Simple Bail Mehndi Design
Aesthetic Mehndi Design
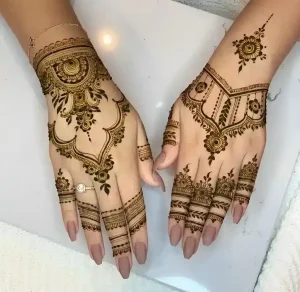
Bracelet and Finger Same Mehndi Design
Simple Mehndi Design for Kids
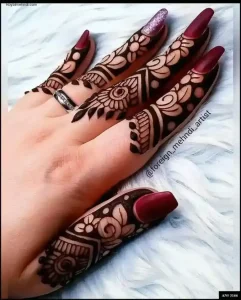
Royal Mehndi Design
Simple Bail Design
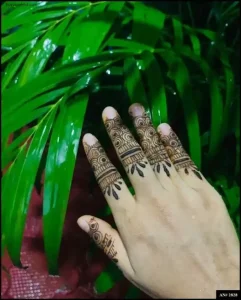
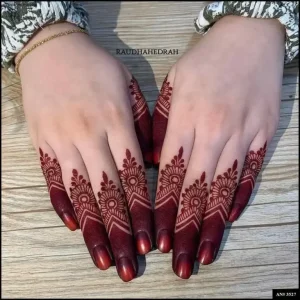
Unique Finger Mehndi Design
Arabic Bridal Henna Design
Unique Style Arabic Mehndi Design

Simple Indian Mehndi Design

Full Hand Arabic Mehndi Design

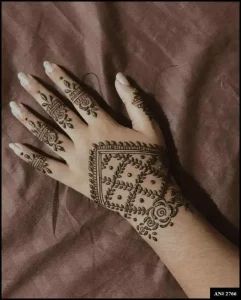
Stylish Back Hand Mehndi Design
Simple Mehndi Design for Kids
Simple Tikki Design for Kids
Stylish Jaal Mehndi Design
One Side Bail Design

Moon Style Henna Plan

Simple and Unique Bail Design

Tikki with Bushes Style Henna Plan

Double Style Heart Henna Plan
Butterfly Mehndi Design

Lines Style Finger Mehndi Design

Bridal Tikki Mehndi Design

Additional dabs – Include modest specks around the bloom or along the stem for a sensitive touch.
Where to Utilize This Plan:
Fingertips (one speck blossom per finger)
Palm Center (as a standalone theme)
Wrist (expand the stem into a vine)
Professional Tip:

Hone with a toothpick on paper, to begin with in the event that you’re modern to Simple Henna Plans! Need a bolder see? Thicken the stem or include more blooms.
Would you like a visual portrayal of this plan?
Draw a blossom
Here’s a straightforward step-by-step to draw a henna bloom beginning from a speck:
Simple Henna Plans Bloom Instructional exercise
Begin with a speck – This will be the center of your flower.
Draw petals – Around the dab, make 5-6 “U” shapes (like enclosures) touching the center. Keep them equally dispersed.
Include a moment layer (discretionary)
Layout the primary petals with a moment push of bent lines for a full see.
Beautify the center
Fill the speck with little lines, or a starburst, or take off it plain.
Expand with leaves/vines – Draw comma-shaped clears out or a wavy stem from the base of the Simple Henna Plans.
Varieties Basic Daisy:
Fair one layer of petals + a dab center.
Nitty gritty Rose: Twirl the petals internally with layered bends.
Easy Jaal Henna Plans
Lotus: Include pointed, stretched petals in two lines.
Professional Tip:

Utilize a toothpick or cone with a lean tip for clean lines. Hone on paper to begin with!
Would you like a finger/wrist plan utilizing this bloom? 😊
Include takes off
Here’s how to include clears out to your henna bloom for a total, characteristic see:
Basic Henna Clears out Instructional exercise
Fundamental “Comma” Leaf

Begin from the stem/flower base.
Draw a bent line (like a in reverse “C”).
Include a moment bent line reflecting the primary, decreasing to a point.
Matched Takes off
At a joint (where stem parts), draw two clears out confronting inverse bearings (like a “V” with bends).
Leaf Varieties
Tear Leaf: A single stroke thickening toward the tip.
Serrated Edge: Little “M” shapes along the leaf’s edge.
Veins: Include a black-out central line or little strokes interior of the leaf.
Where to Put Clears Out:

On stems (rotating sides).
Around Simple Henna Plans (surrounding the petals).
As fillers between Simple Henna Plans
Master Tip: Keep clears out smaller than petals for adjustment. Combine with the bloom plan from prior for a smaller-than-expected vine!
Need to see how it interfaces to a full-hand plan?
Amplify with a vine Simple Henna Plans
Here’s a basic vine mehndi plan to expand your botanical theme richly:
Step-by-Step Vine Expansion

Begin from your flower/leaf – Start the vine where your past Simple Henna Plans closes (e.g., stem base or side of a petal).
Draw a wavy line – Utilize a lean, streaming stroke that bends tenderly (like a loose “S” shape).
Include takes-off – Alternate small “comma” or teardrop leaves along the vine, facing the direction of the curve.
Sprinkle little dabs or buds
Put micro-dots or scaled-down hearts between takes off for sensitive detail.
Department out (discretionary) – Part the vine into two more slender lines and rehash the design.
Plan Situation Thoughts:
Wrist to lower arm – A single vine wrapping around.
Fingers – Lean vines trailing from knuckles to nails.
Palm borders – Outline your hand with interlaced vines.
Professional Tip: For a 3D impact, thicken one side of the vine marginally (like a shadow).
Need to see how to put through vines to a full-hand plan?
(Visual reference: Envision a “waterway” of delicate bends with clear-out coasting near it!)
Little specks & clears out mehndi
Here’s an elegant and easy mehndi plan combining little specks and leaves—perfect for an inconspicuous however exquisite see:
Minor Specks & Sensitive Takes off Plan
1. Base Vine:
Draw a lean, wavy line (like a free “S” shape) as your central direction.
2. Include Clears out:
Put smaller than expected “comma” clears out (➜) along the vine—alternate sides for adjustment.
For assortment, blend in tear clears out (♥) or heart-shaped clears out.
3. Sprinkle Dabs:
Scramble minor dabs around takes off, like dewdrops or filler stars.
Cluster 2-3 specks close leaf tips or vine bends for cadence.
4. Emphasizes:
Include smaller scale blossoms (fair a dab + 4 modest petals) between clears out.
Utilize dashed lines (•••) near the vine for the surface.
Where to Apply:
Fingers: Path a vine from knuckle to nail, dabbed with scaled-down takes off.
Wrist: A fragile vine bracelet with dot-and-leaf charms.
Palm Edges: Outline your hand with scattered dabs and verdant sprigs.
Master Tip: Utilize a toothpick or fine-tip cone for accuracy. Less is more—keep it breezy!
Visual Motivation:

Join Design Bail Style Henna Design
Side Tikki henna Plan for Bride

Jewelry Style Henna Plans:
Bracelet Style with Tikki Henna Plan:

Envision Design:

•~~♡~~•~~➜~~•~~♥~~•
(A vine of dabs, hearts, and commas!)
Need a strong turn? Thicken the vine or include peacock-style twirls!