

Here’s a straightforward flower mehndi plan idealised for fledglings or fast application:
Plan Steps:

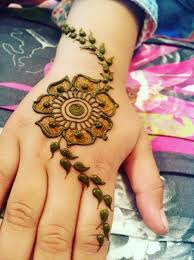
Begin with a little dab within the center (this will be the flower’s center).
Draw 5-6 little petals around the speck in a circular shape (like a daisy).
Include modest specks or lines between the petals for additional detail.
Amplify a lean stem descending from the flower.
Include straightforward takes off on either side of the stem (draw a bent line with little strokes for veins).
Rehash 1-2 more blooms adjacent to it for a minor cluster.
Tips for a Clean See:
Utilize a fine-tip flower mehndi cone for accuracy.
Keep petals symmetrical but defective for a characteristic see.
Include little dabs or whirls around the plan to fill holes.
This plan takes less than 5 minutes and works well on hands or feet. Would you like a visual portrayal or variety?
Begin with a little dab.
Here’s a super straightforward step-by-step for a beginner-friendly flower mehndi plan, beginning with a little speck:
1. Little Dab (Bloom Center)
Apply a minor dab where you need your flower to be (e.g., back of the palm, finger, or wrist).
2. Petals Around the Dab
Draw 5-6 bent lines (like “U” shapes) around the dab to create petals. Keep them equitably divided but do not stress approximately perfection—organic looks prettier!
3. Include Points of interest Interior the blossom:

Include minor specks or a moment layer of smaller petals interior the primary layer.
Exterior the blossom:
Draw a lean stem (fair a single bent line) descending.
4. Basic Clears out
On the stem, draw 2-3 takes off (like stretched “tears” with a center line).
5. Discretionary Additional items
Include minor specks or stars around the blossom for a full see.
Rehash a smaller adaptation of this blossom adjacent for a smaller-than-expected bouquet.
Plan Situation Thoughts:
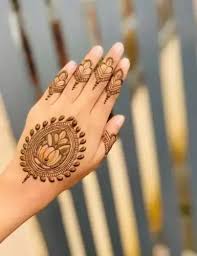
Fingers :
One blossom per fingertip with a trailing vine.
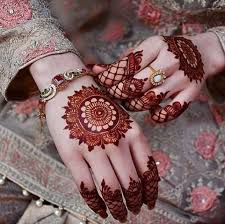
Wrist/Palm:
Cluster 3 little blooms with take off.
Time:
It takes a fair 2-3 minutes per blossom!
Would you like a back-of-hand layout or a peacock-plume combo?
Draw 5-6 little petals.
Here’s a nitty gritty breakdown of how to draw 5-6 little petals around a speck for your flower mehndi plan, with tips to keep it flawless and symmetrical:
Step-by-Step Petal Direct
Begin with the Center Dab
Apply a little, striking speck (this will stay your petals).
To begin with Petal (Best Center)
Draw a “U” shape (like a grin) fair over the dab, touching it. This is often your, to begin with, petal.
Include Inverse Petal (Foot Center)
Reflect the same “U” shape underneath the speck.
Side Petals (Cleared out & Right)
Draw two more “U” shapes on the cleared-out and right sides of the speck. Presently you have got 4 petals (like a + sign).
Corner to corner Petals (Discretionary 5th & 6th)
Fill holes between the primary four petals with smaller “U” shapes to make 5-6 petals add up.
Tips for Culminate Petals
✔ Symmetry Hack:
Envision a clock—place petals at 12, 3, 6, and 9 o’clock, at that point include more at 2 and 5 o’clock.
✔ Keep Petals Lean:
Utilize lightweight for fragile bends.
✔ Uneven Petals? Change by thickening one side to adjust.
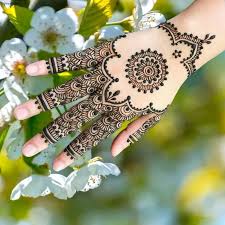
Varieties Open Blossom:
Include a moment external layer of petals.
Closed Bud:
Draw fair 3 petals and a pointed stem.
Include modest dabs or lines.
Here’s how to include minor specks or lines to raise your basic flower mehndi design, with placement thoughts and professional tips:
1. Little Dabs (Speedy & Exquisite)
Around the Blossom:
Diffuse 3-5 minor specks near the petals (like dewdrops).
Between Petals:
Place a single speck within the holes to fill the space.
Along the Stem:
Dab the stem delicately for a “seeded” see.
Professional Tip:
Vary dot sizes (a few strong, a few swoons) for depth.
2. Sensitive Lines (Unobtrusive Detail)
Petals:
Include a single lean line down the center of each petal.
Clears out:
Draw 2-3 brief lines (veins) branching from the center.
Stem:
Deliver it a “turned vine” impact with a winding or crisscross line.
Master Tip:
Utilize the edge of your cone tip for the finest lines.
3. Combo Thoughts (Specks + Lines)
Sunburst Bloom:
Substitute dabs and brief lines around the flower‘s external edge.
Enchantment Vine:
Speck the stem and include modest “C” lines between leaves.
4. Progressed Touch (For Consistent Hands) Stippling:
Cluster micro-dots at the bloom center for the surface.
Stars/Moons:
Supplant dabs with smaller-than-expected shapes for celebration vibes.
Where to Put?
Fingers:

Dabs on knuckles, lines on phalanges.
Palm:
Outline your bloom with dabbed curves.
Need a wrist sleeve plan to coordinate?