

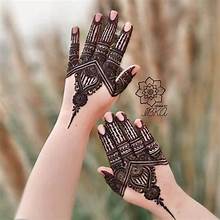
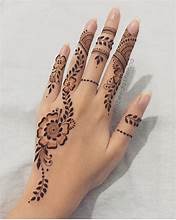
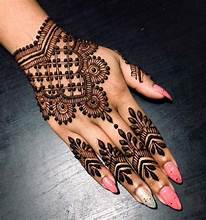
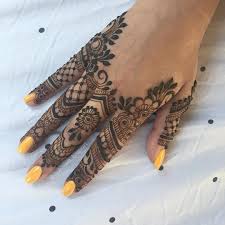
Finger mehndi (henna) design
Here are some beautiful and trendy finger mehndi (henna) designs you can try:
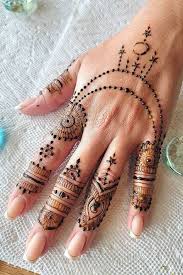
1.Simple & Elegant

Dainty dots & lines – Minimalist dots connected with fine lines. Single floral motif – A small flower on the fingertip with delicate vines.
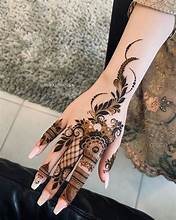
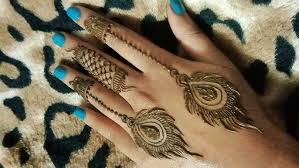
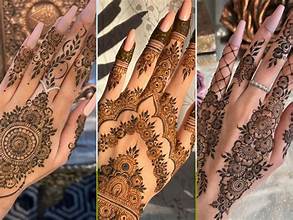
2.Peacock Feather Design
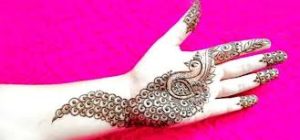
A peacock feather extending from the base of the finger mehndi to the tip. Accentuated with small swirls & leaves.
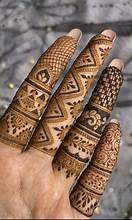
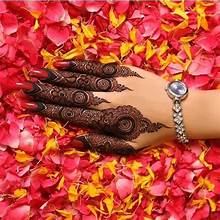
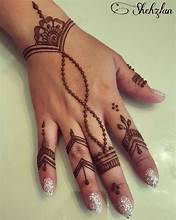
3.Finger Ring Mehndi
A bold band around the finger (like a ring) with tiny floral or geometric patterns.Matching designs on multiple fingers for a cohesive look.
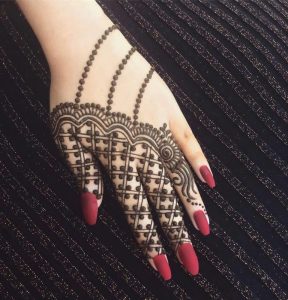
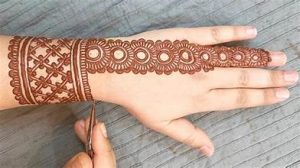
4.Full Finger Coverage
Intricate lace-like patterns cover the entire finger. Jali (net) designs with tiny flowers and leaves.
5.Arabic Finger Mehndi

Bold, flowing patterns with wide strokes and minimal details.Large floral motifs cover half the finger.
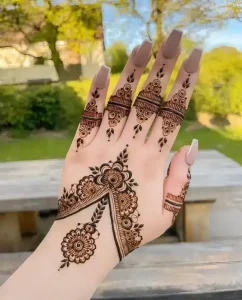
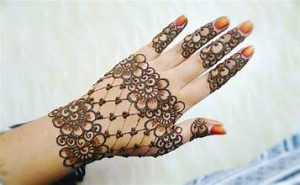
6.Backhand & Finger Combo
Extending designs from the palm to the fingers for a seamless look.Fingertip highlights with bold patterns.
7.Modern Abstract Mehndi

Geometric shapes (triangles, diamonds) with fine lines.Negative space designs for a contemporary touch.
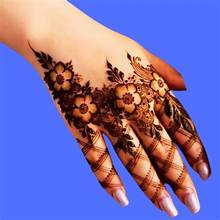
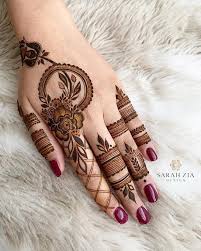
8.Bridal Finger Mehndi
Dense floral patterns with jewel-like dots.Intricate detailing with pearl or stone accents (for special occasions).Would you like a step-by-step guide for any of these designs?
1.Simple & Elegant

Simple & Elegant Finger Mehndi Design – Step-by-Step Guide
This design is perfect for beginners or those who prefer a minimalist yet stylish look.
It’s quick to apply and looks delicate.
Materials Needed:
✔ Fresh henna cone (with a fine tip)
✔ Cotton or tissue (for cleaning mistakes)
✔ Optional: Lemon-sugar sealant (to darken the stain)
Steps to Create the Design:
1.Baseline (Foundation)
Start by drawing a thin horizontal line at the base of your finger (near the palm).You can make it straight or slightly curved for a softer look.
2.Vertical Stem
From the center of the baseline, draw a delicate upward stroke along the length of your finger (stop before the fingertip).
3. Minimalist Leaves & Drops
Add small, curved marks (like tiny leaves) emerging from the stem.
Make sure to alternate sides so it looks balanced.
For a more elegant look, add tiny dots along the stem or near the leaves.
4.Fingertip Accent (Optional)
Draw a small flower, heart, or crescent moon at the fingertip.Or, just make the stem longer with a tiny swirl or dot.
5.Side Patterns (Optional)
If you want more detail, add mini zigzags, dashes, or tiny flowers along the sides.
Tips for a Clean Look:
Keep the lines thin and even – a fine-tip henna cone works best.
Symmetry is important – try to mirror the design if applying it on multiple fingers.
Let it dry naturally – avoid smudging for a crisp stain.Would you like a visual sketch of this design?
I can describe it in more detail!
For a darker stain, apply a lemon-sugar mix after it dries and keep it on for 4 hours or more.Would you like variations (like ring-style, zigzag, or lace patterns) on this simple design?
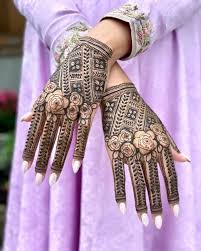
Finger Ring Mehndi
Finger Ring Mehndi Design – Step-by-Step Guide
A ring-style mehndi is great for a bold yet minimalist look.
It looks like jewelry and can be used alone or paired with other designs.
Materials Needed:
✔ Henna cone (fine or medium tip)
✔ Cotton swabs (for corrections)
✔ Lemon-sugar mix (optional, for darker stain)
4 Stunning Finger Ring Mehndi Styles
1.Classic Band Ring (Easiest)

Draw a thick horizontal band around your finger (like a ring).
Add tiny dots, dashes, or crosses along the band for detail.
Pro Tip: Make the band wider near the knuckle for a statement look.
2.Floral Ring Mehndi (Feminine & Elegant)
Start with a thin band around the finger.
Add small flowers or petals along the top or bottom edge.
Connect them with curved vines or leaves.
3. Moroccan Geometric Ring (Modern & Chic)
Draw a zigzag or triangular band instead of a straight line.
Fill the gaps with tiny diamonds, dots, or lines.
Bonus: Add a small mandala on the fingernail side.
4.Bridal Jewelry Ring (Intricate & Royal)
Make a double-line band with pearl-like dots in between.
Add small hanging designs (like paisleys or stars) below the ring.Optional: Extend a delicate chain to the fingertip.
Pro Tips for a Clean Look:
✔ Symmetry is important – you can use a light pencil to help you if you need.
✔ Thick vs.
Thin – A wide band looks bold, while a thin band is more subtle.
✔ Pair it up – apply on several fingers to create a matched look.
Aftercare for Darker Stain:
Leave the henna on for 2-3 hours (the longer you leave it, the darker it will look).
Use a lemon and sugar mix to make the color richer.
Avoid water for 6-8 hours after you take it off.
Would you like a fusion design (like a ring with fingertip mehndi)?
Try this: Mix a bold ring band with a small flower on the fingertip for a balanced look!
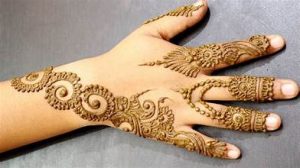
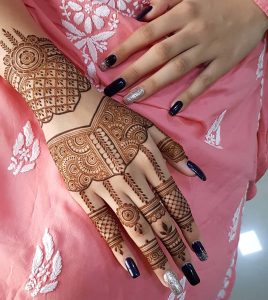
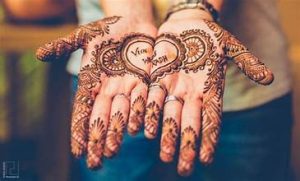
Bridal Finger Mehndi
Bridal Finger Mehndi Designs – Royal & Intricate Patterns
(Perfect for weddings, engagements, and special occasions!)
Bridal finger mehndi focuses on delicate details, elegance, and meaning.
Unlike palm designs, fingers need careful work to add intricate designs without making them too busy.
Top 6 Bridal Finger Mehndi Styles
1.Royal Jewelry Motifs
Design: Looks like bridal jewelry with patterns like chandeliers, stone shapes, and chains.
Placement: Covers the whole finger from the knuckle to the tip.
Best For: Brides who love traditional and glamorous styles.
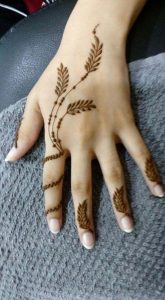
2.Lace & Jaali Finger Mehndi
Design: Net-like (jaali) patterns with small flowers, swirls, and peacock shapes.
Placement: Side fingers have light designs, while the ring finger has a strong main pattern.
Best For: A soft, elegant, and vintage bridal look.
3. Bridal Finger-Tip Emphasis
Design: Big flower clusters at the fingertips, connected by thin vines.
Placement: Covers the top half of the fingers for a gentle, romantic feel.
Best For: Brides who want detailed fingers but keep the palm simple.
4.Asymmetric Finger Bridal Mehndi
Design: One side is detailed with peacock, flower, or paisley designs, while the other side is plain.
Placement: Different fingers have different styles for a modern and stylish look.
Best For: Brides who love artistic and uneven designs.
5.Full Sleeve Finger Mehndi
Design: Complex patterns that flow from the palm to the fingertips like sleeve embroidery.
Placement: All fingers are fully decorated with matching designs.
Best For: Big weddings and cultural celebrations.
6.Hidden Name/Initial Mehndi
Design: The groom’s name or initials are quietly included in the patterns.
Placement: Usually on the ring finger or pinky.
Best For: A meaningful and personal touch in bridal mehndi.
Pro Tips for Bridal Finger Mehndi
✔ Keep it balanced – if the design is too thick, the whole look might feel too much.
✔ Make the ring finger stand out – brides usually add more details there.
✔ Match your mehndi with your dress – if your outfit has peacocks or flowers, include similar patterns in your mehndi.
✔ Trick for longer-lasting color – after you remove the henna, apply a mix of mustard oil and sugar to make the stain darker and last longer.
Bonus: Creative Ideas for Bridal Finger and Ring
A bold henna “ring band” with extra lacework.
Place real jewelry over the dried henna for a 3D look.
Use dots shaped like gemstones to resemble polki or kundan designs.
Would you like a step-by-step guide for any of these designs?
Or maybe some fusion ideas, like mixing Arabic styles with bridal fingers?
Example: “A peacock feather on the ring finger, with small diamonds around it and flowing vines on the other fingers.
“